Stories
Storyboard
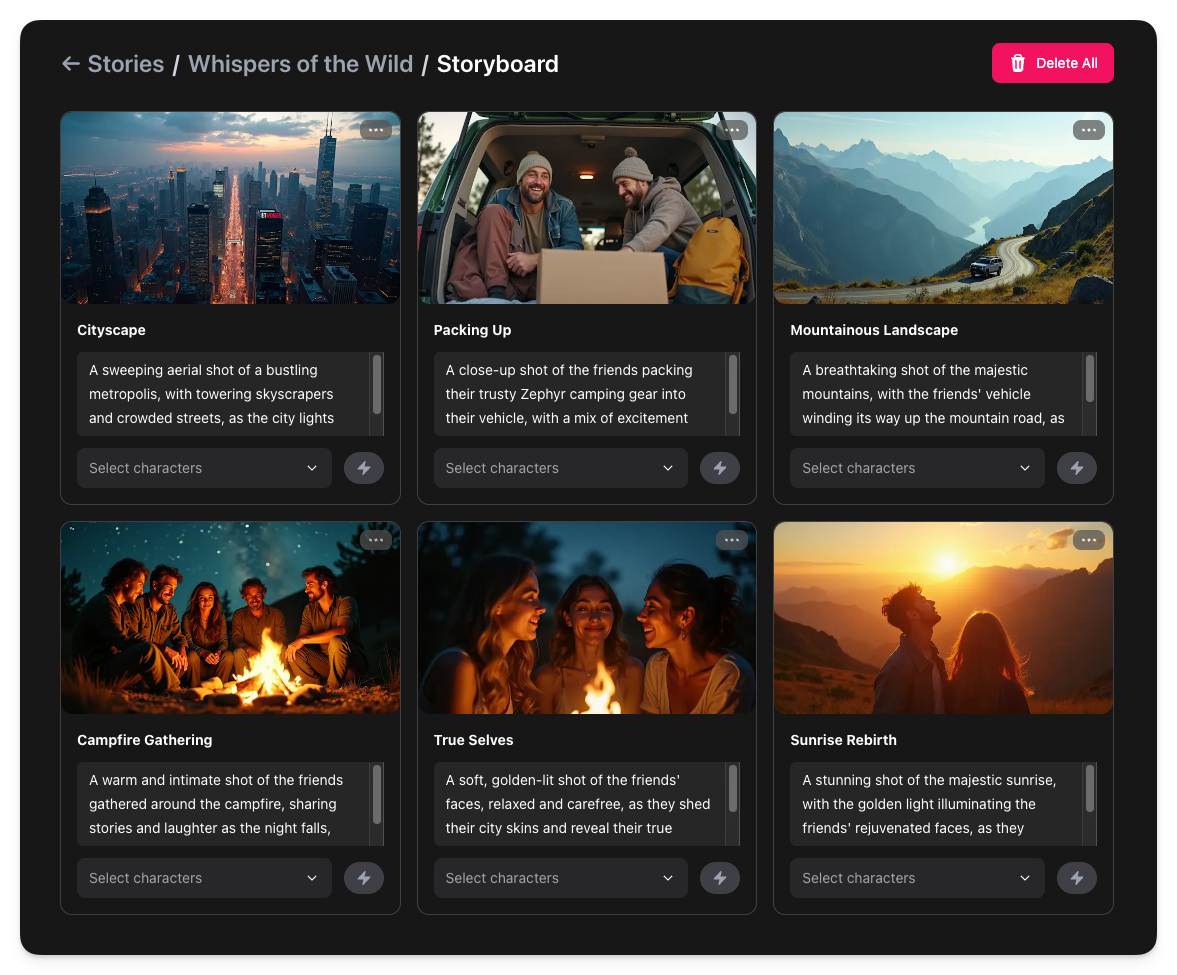
Just like a movie, a story can be represented as a sequence of scenes. The storyboard is where you create and manage these scenes.
StoryReel will generate an initial storyboard for your story, which might look like:
Scene Cards
Each scene in the storyboard is represented as a scene card. This gives you an overview of the scene with the ability to perform various common actions. Here are two cards with the second card showing the contents of the top-right menu.
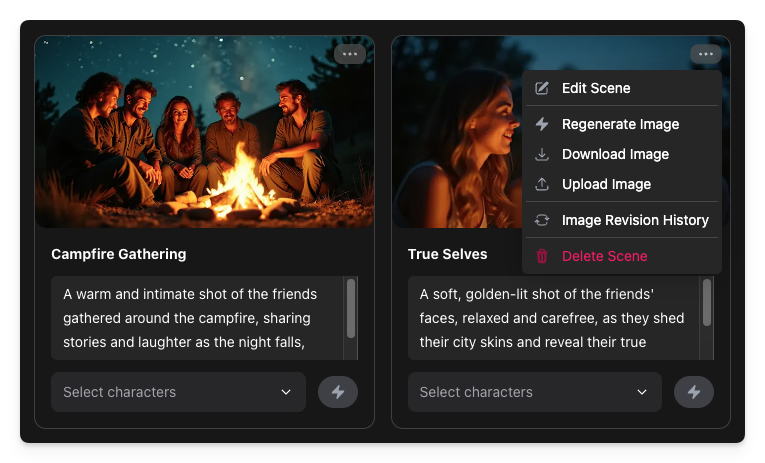
The scene card menu provides access to the following functionality:
- Edit Scene: open the Scene Editor to edit all aspects of the scene
- Regenerate Image: generate a new image using the existing prompt
- Download Image: download the image for this scene, e.g., to edit it yourself
- Upload Image: upload an image file from your desktop as the scene image
- Image Revision History: view all image versions for this scene
- Delete Scene: delete this scene from the storyboard
You can also easily generate a new image by clicking on the bolt icon in the bottom-right of the scene card.
Hint
You can tweak any scene image in your favorite image editor by using the "Download Image" menu option to get a local copy and then using the "Upload Image" option to install your edited version.
You can also download all scene images in a single ZIP file via the "Download All Images" menu option on the Storyboard section of the story overview page.
Reorder Scenes
You can easily reorder the scenes in your storyboard by dragging them to a new location. The following video demonstrate this functionality.
The Scene Editor
If you want to change the details for any scene in the storyboard, you can select the "Edit Scene" option in the scene menu. This will bring up the Scene Editor, which looks like:
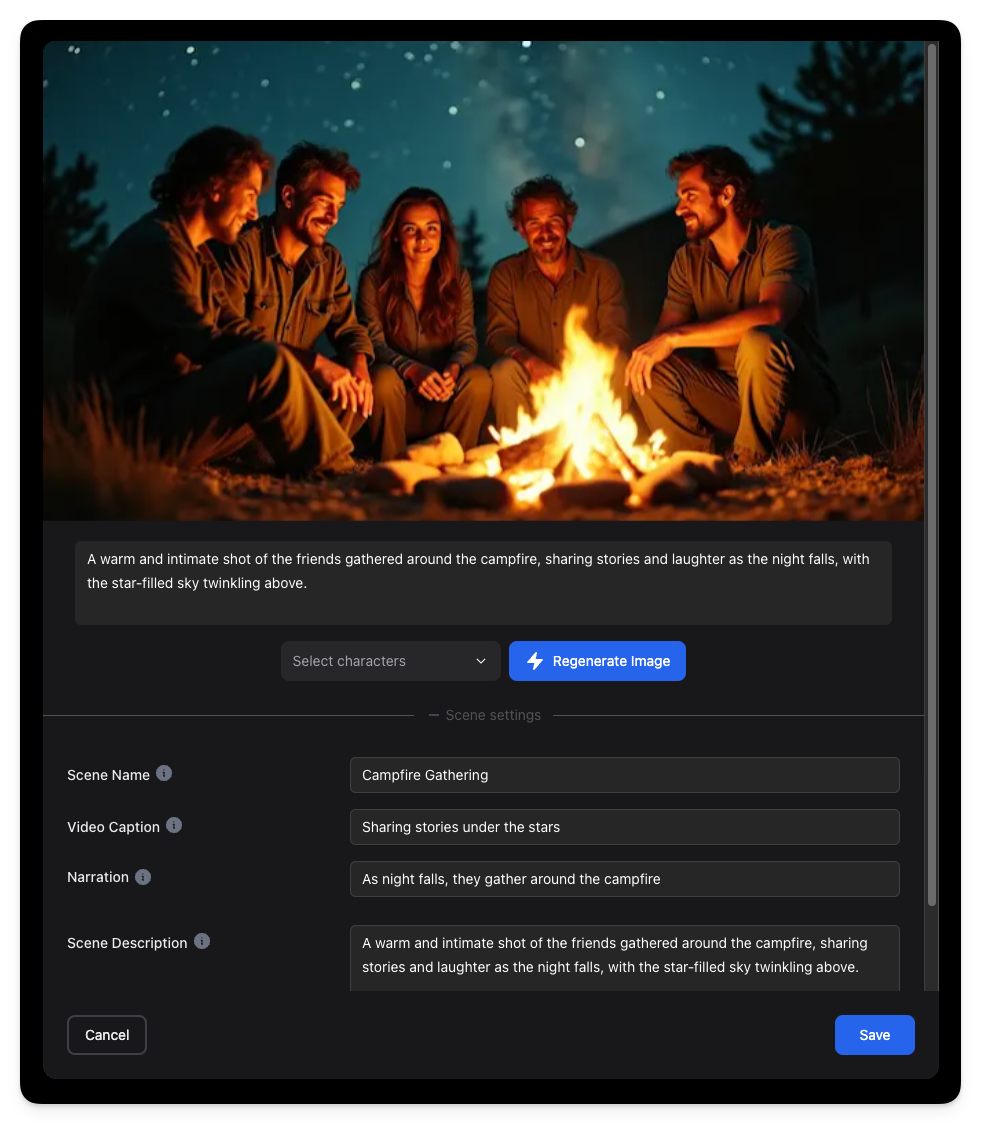
From the scene editor, you can change the scene image as well as the scene metdata, such as the title and description that's shown on the scene card. To generate a different image for the scene, try just pressing the "Regenerate Image" button.
The scene editor also lets you define a caption for the scene, which will be displayed at the bottom of the frame in the final video. And you can specify a narration text, which will be spoken by a narrator voice in the final video. For more details on these features, see the Video Reel.
You can control the timing and prosody of the narration in a number of ways, e.g.,
- You can insert pauses using SSML syntax, e.g.,
<break time="1.5s"/> - You can alter the pronunciation of a single word using the
<phoneme/>SSML tag, e.g.,<phoneme alphabet="cmu-arpabet" ph="T AE1 L AH0 N">talon</phoneme>[Learn More] - Punctuation like "-", "--", or "..." can often introduce a pause, depending on the voice
- Punctuation like "!" or "?" can be used to alter the tone of the voice.
Regenerate Storyboard
If you'd like to start over with an entirely new storyboard, you can delete all of the scenes in the storyboard by clicking the "Delete All" button in the top-right corner of the page. After a short delay, the page will refresh to look like:
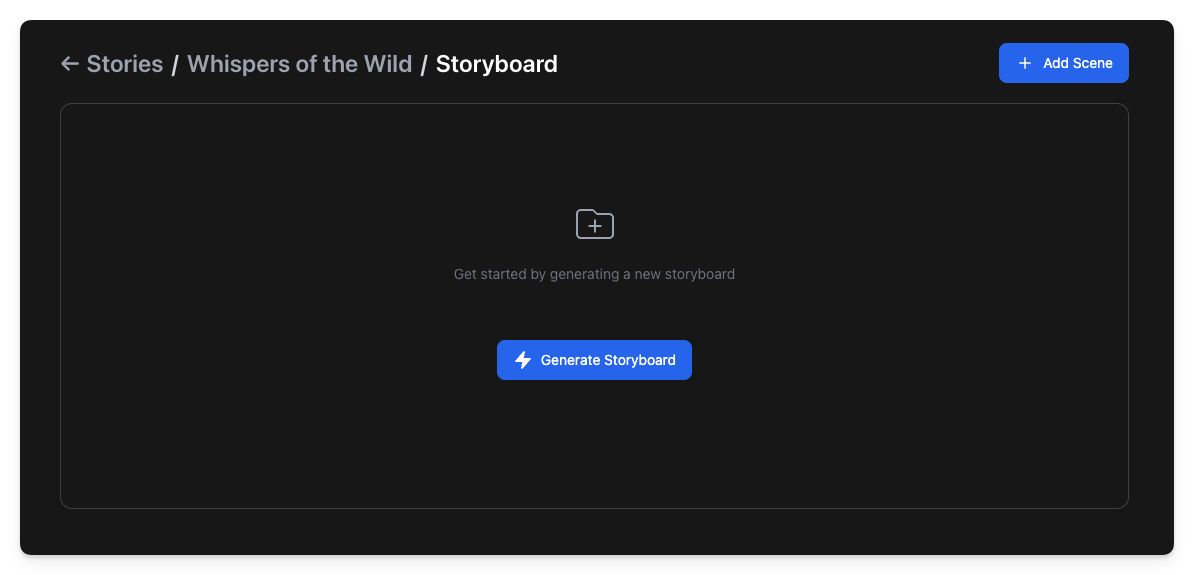
From here, you can either manually add the first scene to the storyboard via the "Add Scene" button. Or you can generate an entire storyboard with the "Generate Storyboard" button.
Character Consistency
StoryReel tries to ensure that characters look the same across all the scenes in your storyboard. This is something that's difficult to achieve with today's generative AI technology. But StoryReel uses a range of different techniques to try to achieve this.
When a scene contains only one character, StoryReel can use the headshot image for that character to generate imagery that should very closely resembly that character image. This provides the best visual consistency solution. We therefore recommend selecting a single character for each of your scenes where possible. (You can still use a different character for different scenes.)
Hint
For the most consistent character representation in your scene, select a single character to be used in the scene.
For two or more characters, StoryReel uses the physical descriptions of those characters to attempt to try to maintain consistent character representations. This will produce visual representations that are similar to your character headshots, but will likely not be an exact match. To make this technique work better, you should provide more detailed summary and physical characteristics in the character definition.
Getting the perfect scene image may involve trying different generative prompts. So we let you directly edit the prompt to be able to fine tune the resulting image. Try adding additional directions to the prompt to steer it toward what you want, e.g., do you want to specify the time of day, number of people in the shot, whether its indoors or outdoors, the weather conditions, etc. Generally, shorter prompts work best.